Deepnest vs Kenzap Nesting
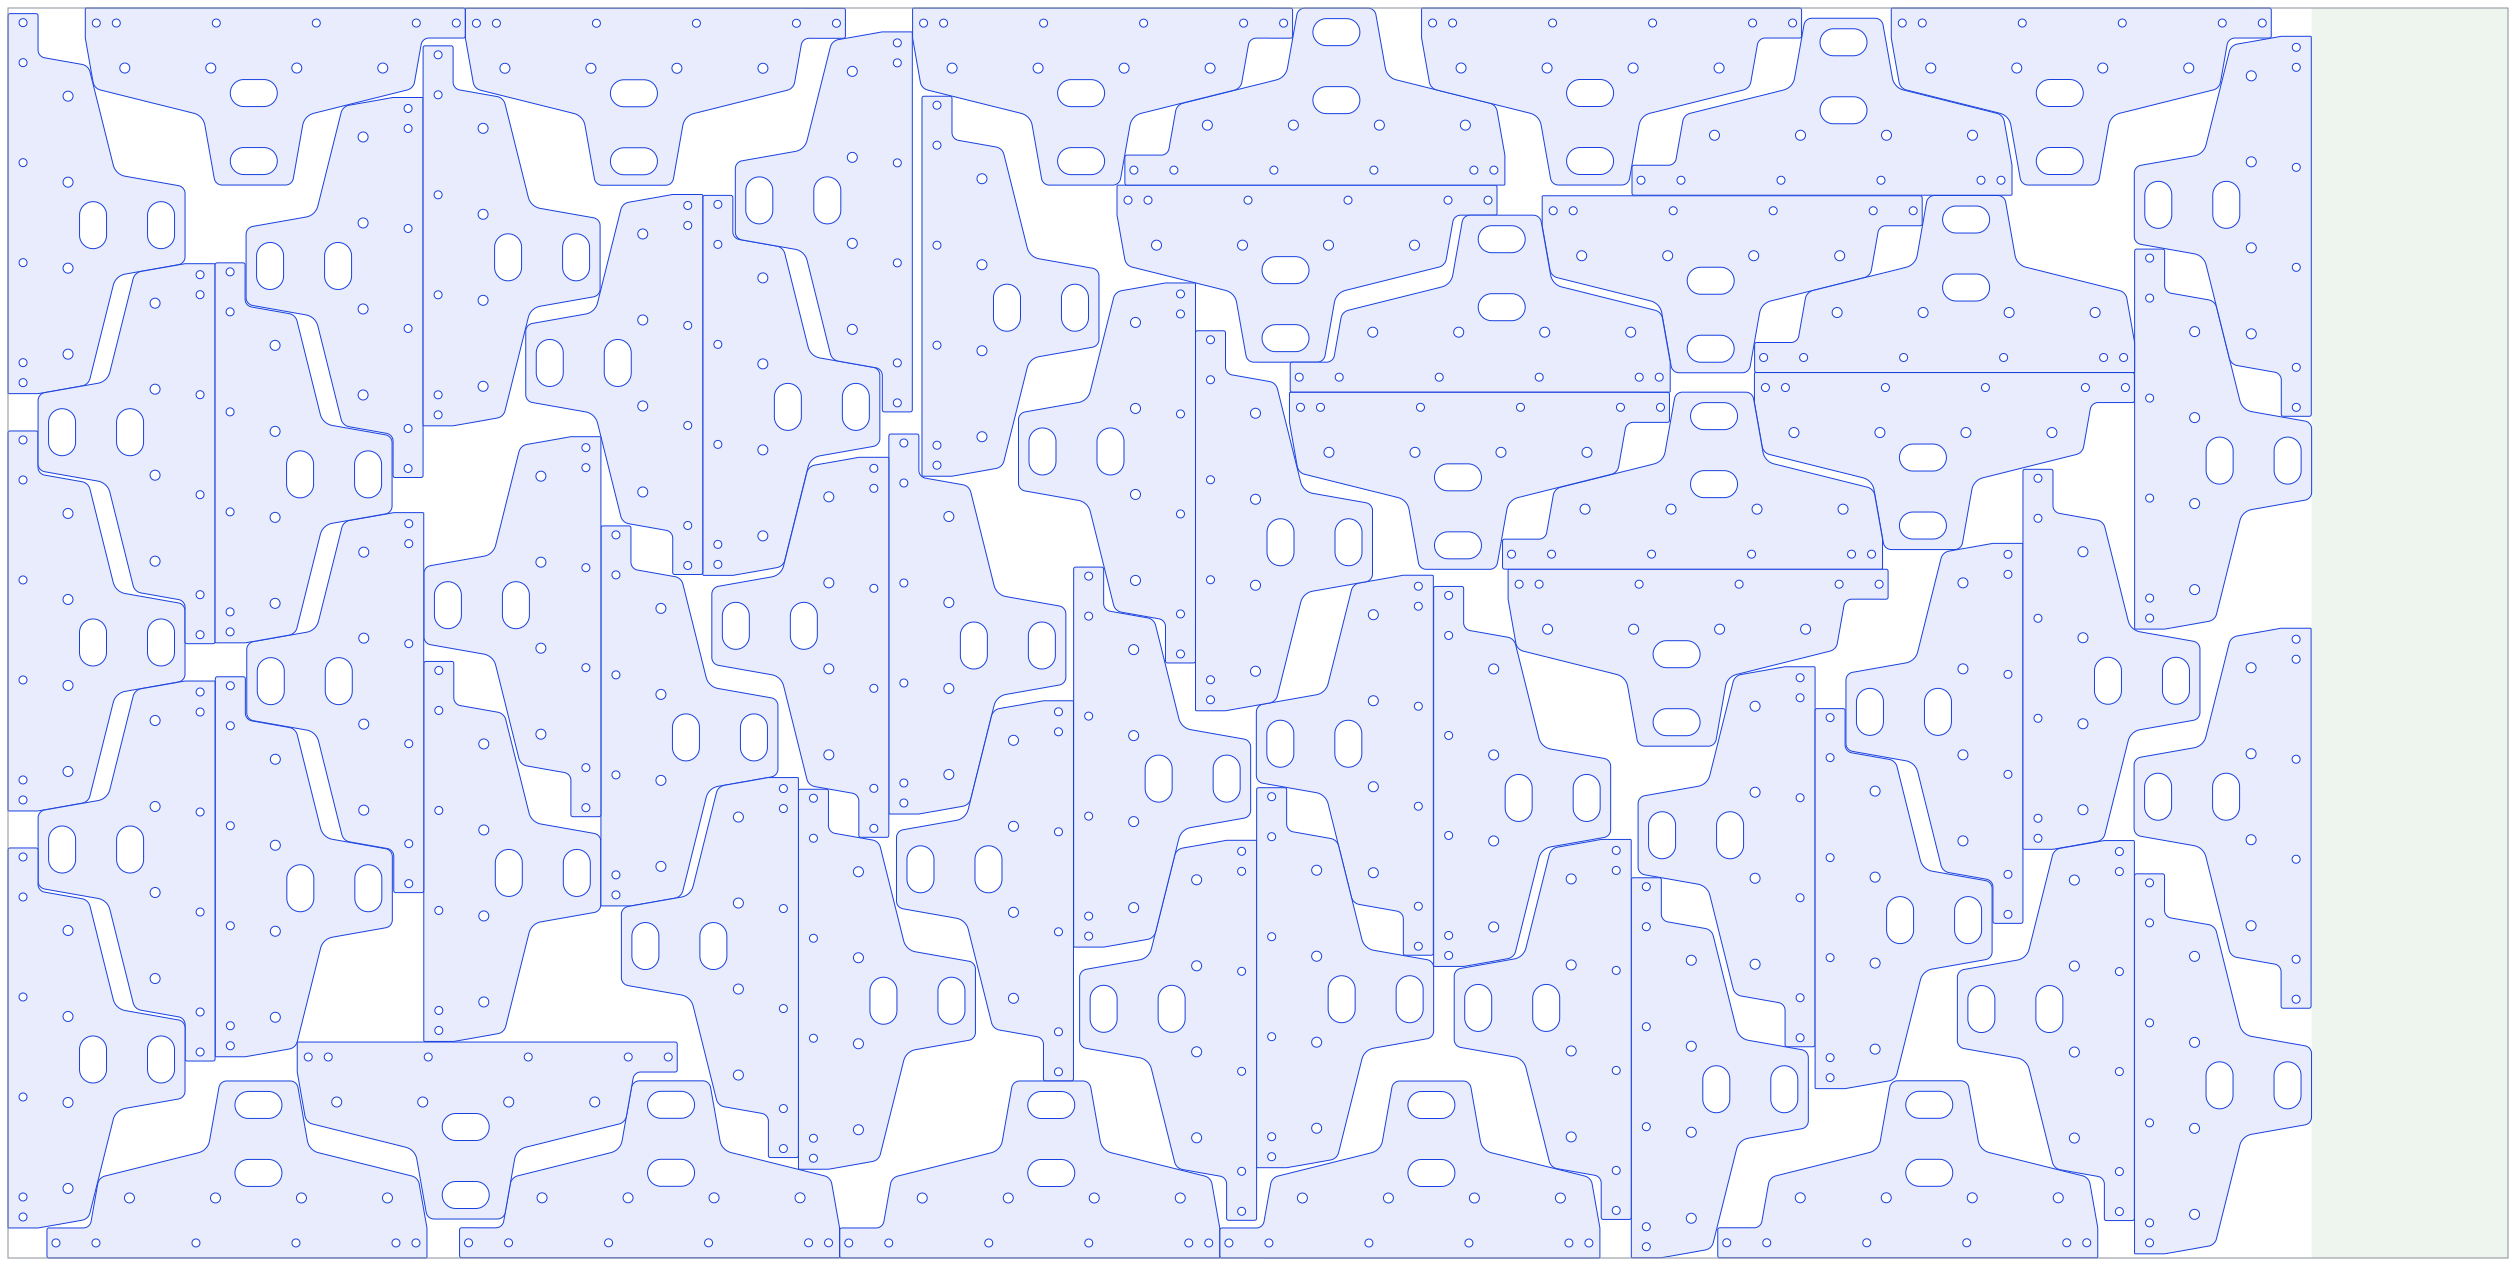
I gave Deepnest, Deepnest-next and Kenzap Nesting the same 61-part job. Then I looked beyond the previews to see what was actually in the exported DXFs.

Disclosure. I build Kenzap Nesting, so this is not an independent review. It is one person's opinionated account of a single test. I've included the exports, screenshots and geometry checks so you can inspect the results yourself.
I had 61 parts. Could they all fit on one standard sheet? And how long would I be waiting for the nest?
That's the question I started with. This article compares Deepnest, Deepnest-next and Kenzap Nesting. I left original Deepnest in as a baseline, but I mostly focused on Deepnest-next v1.5.6: the community-maintained version shown in the screenshots.
The job came from Skarda Nams, a roofing company in Latvia. They cut 1250 × 2500 mm steel sheets, 2 mm and 4 mm thick. The sheet size doesn't change. The way the parts sit on it does.
In a real workshop, that layout is a daily issue. A few centimetres can be the difference between one sheet and two. Waiting for a better nest also eats time, and a nice-looking preview still has to become a cutting file that works.
I wanted to test that on a real production part, not on a pile of shapes chosen just to flatter a benchmark.
Why I picked this part
I used a snow guard blank. It's part of a snow retention system for metal roofs. The shop needed 61 of them, so the goal for the test was simple: fit the whole order on one sheet.
Each blank is about 177 × 380 mm. It has curved notches, two slots and ten holes. You can't just stack that outline in a rectangular grid. I wanted to see how each program would arrange them, and whether all twelve internal cuts would still be there after export.
Why Kenzap handles stock differently
I started Kenzap Nesting with sheet-metal and steel-plate cutting in mind. One question kept coming up from factories: if you're cutting from coil, how many sheets do you need, and how long should each one be, so the order fits with as little scrap as possible?
On one line I worked with, the sheets couldn't be longer than 3000 mm because that was the limit of the laser cutting table. That changes how you nest. You're not forced to lock in every sheet size before you run anything. Kenzap can work out how many sheets you need and what lengths they should be, as long as they stay inside the limits you set. That's mainly useful for coil-fed metal work. I'm not claiming every workshop needs to work this way.
What I wanted to compare
I ran the job through original Deepnest, Deepnest-next and Kenzap Nesting on an Apple M5 Pro running macOS. Same sheet size, same part count. I allowed four rotations in 90° steps and set a 45-second target.
For the Deepnest runs, I let them keep going past that target, just to see if more time would change the result. I wasn't trying to work out which algorithm is best in general. I just wanted to see what each program could do with this particular job.
I wanted to dig deeper into the DXF, too.
I kept three questions in mind:
- How fast?How many of the 61 parts are placed, and when?
- How full?How much of the plate is used, and how much is left empty?
- How does it export?Are the contours complete, are the internal cuts there, and do any parts overlap?
What I saw while they ran
Kenzap Nesting had all 61 parts placed within the first few seconds. The 45-second screenshot already shows the full order on one sheet.
Original Deepnest got to 51 parts in about the first minute, then 55 later on. Some of the parts looked like they were overlapping, so I didn't want to judge that from the preview: I checked the export instead.
Deepnest-next was at 43 parts after 45 seconds. I let it keep running. At five minutes it showed 46. At ten minutes, still 46.
In the video below, I compare Deepnest-next and Kenzap Nesting side by side. Watch it to see the comparison live.
My Honest Deepnest-next Experience
I've been through Apple's App Store verification process myself, so I know how much work it takes. Apple checks developer identity and legal status, reviews usability, and expects applications to follow its UI, privacy and security standards. Even with AI assistance, it is difficult to get everything through without revisions.
Deepnest-next is downloaded outside the App Store. On first launch, macOS showed: “deepnest-v1.5.6” is damaged and can't be opened. You should move it to the Trash.
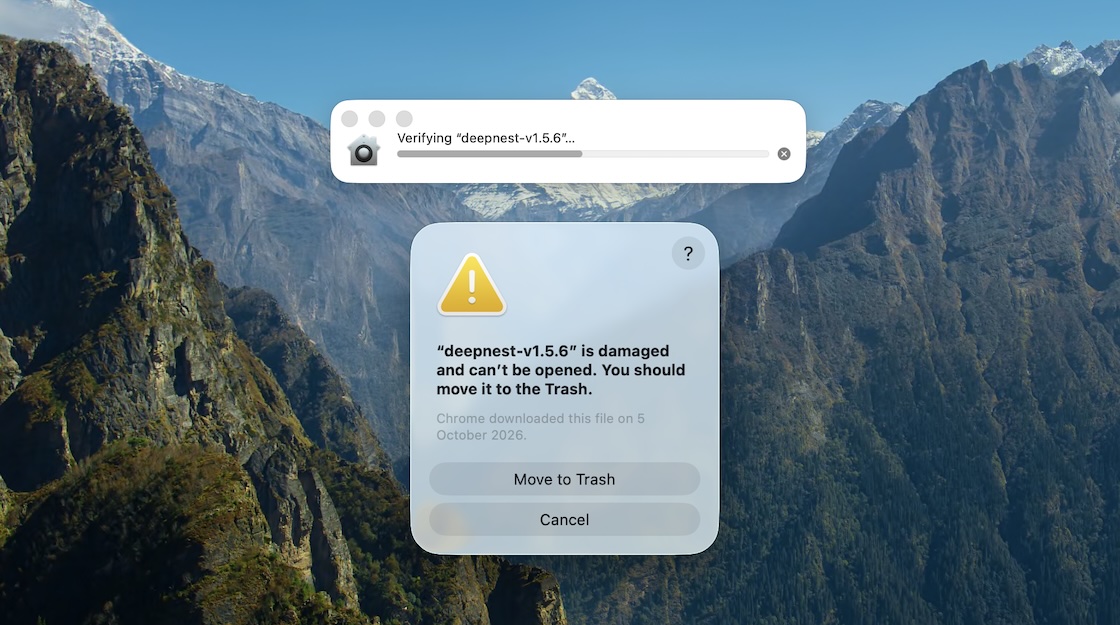
That message does not, by itself, prove that an app is damaged: it can also appear when macOS cannot verify the developer. For this test, I copied the app to Applications and ran xattr -cr /Applications/Deepnest-v1.5.6.app in Terminal. Only do this after verifying that the release came from a source you trust.
Once it opened, the interface was easy enough to figure out. I clicked Import to load my part, as drag and drop didn't work for me, then added a 1250 × 2500 mm sheet using the control at the bottom of the screen.
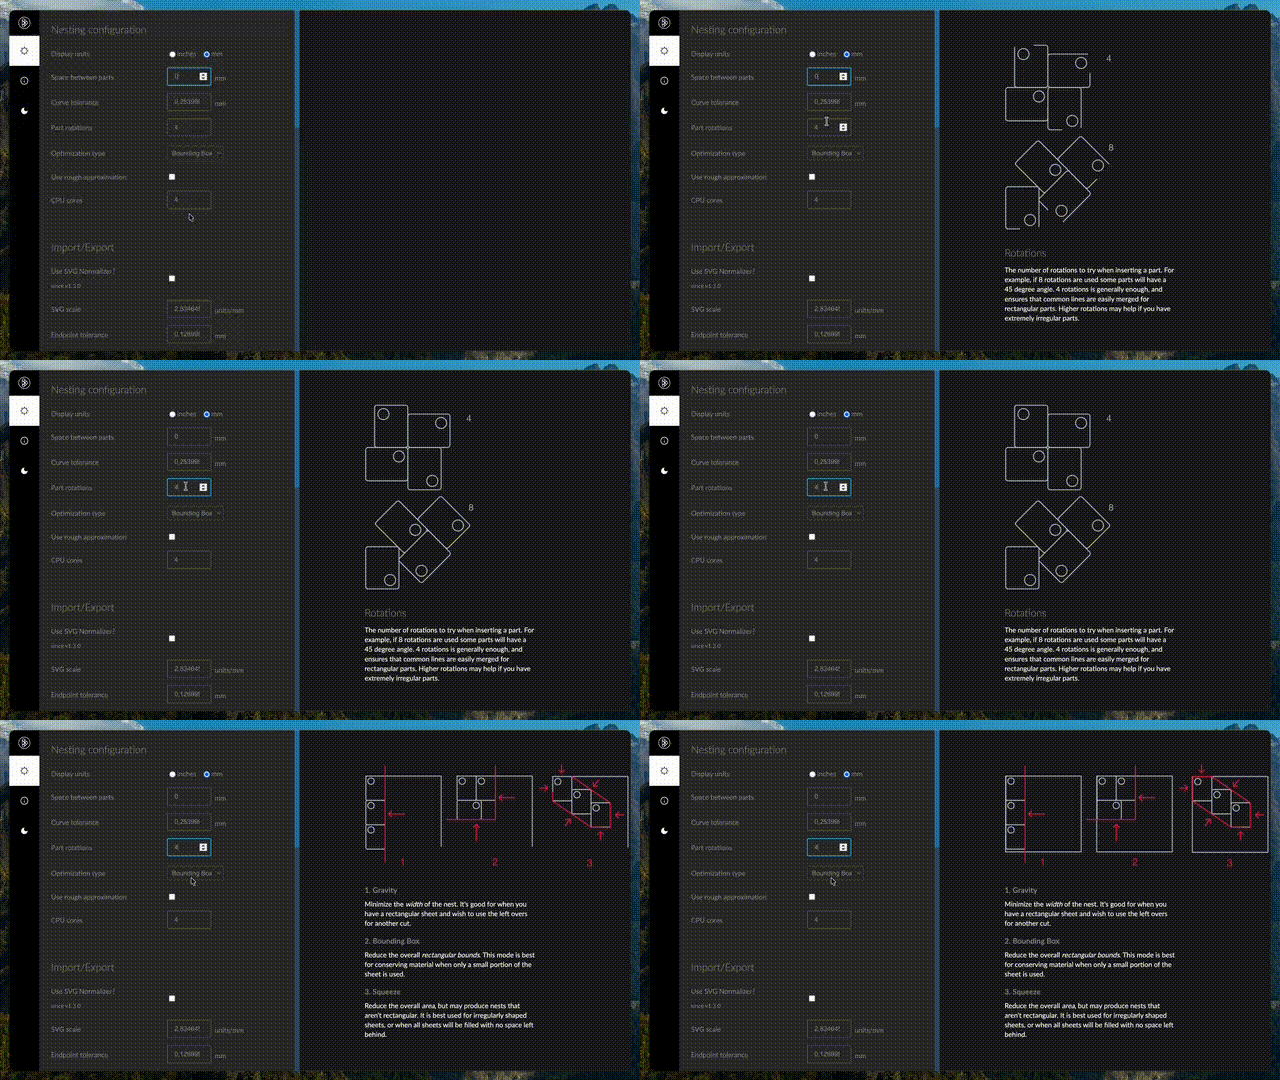
One thing I liked right away was the animations for each setting. They make it obvious what each option does.
Then I hit Start nesting. It took 17 seconds, measured twice, for the preview to go from black to showing placements. At that point, only 45 of 61 parts were placed. After five minutes, the count was 46.
Unlike Kenzap Nesting, Deepnest-next lets me download the final DXF while nesting is still running. I also liked the detailed item rendering on the preview canvas. In Kenzap Nesting, the live preview uses a contoured outline of the part, without its internal holes.
Deepnest-next has three optimization types: Gravity, Bounding Box and Squeeze. I tried all of them. After five minutes, Squeeze and Bounding Box both placed 46 of 61 parts. Gravity placed 45 of 61, even after running for more than five minutes. The initial preview took about 17 seconds regardless of the optimization type.
These are the captures I kept from the runs. You can switch between them and open each one at full size.
Then I looked at sheet use
After exporting the DXFs, I did some extra comparison outside the app. I checked part density, utilization rate as a percentage, and utilized length. The results are in the table below.
| Kenzap Nesting | Deepnest-next | Deepnest | |
|---|---|---|---|
| Complete parts in the DXF | 61 | 43 | 49+ 12 open fragments |
| Coverage of the full plate | 77.8% | 54.8% | n/aUnresolved contours; not calculated |
| Density inside the used area | 84.4% | 58.1% | n/a |
| Plate length used | 2304 mm~196 mm free | 2446 mm | 2500 mm |
The Kenzap file had all 61 parts inside about 2304 mm of the sheet's 2500 mm length. The Deepnest-next export had 43 parts spread over roughly 2446 mm. So Kenzap fit about 42% more parts and still left around 196 mm free at the end.
That's a good result for this job, but I wouldn't turn it straight into a savings claim. The exports don't use the same part clearances, and whether that leftover strip is actually reusable depends on cutting margins, kerf and what the next order looks like.
See it for yourself
Below are the exported layouts side by side. Same sheet, same scale. You can zoom in, and confirmed intersections are highlighted. I didn't move or repair any individual parts: I only rotated each full layout by 90° where that made the comparison easier to read.
The files, if you'd like to check
I've kept the original exports unchanged. Download them and open them in your CAD viewer; the measurements and test notes are here too.
SHA-256
4bc2af27612072d29d2d5685ecc02eff636fea905fef66321b26be97b34f2127SHA-256
01de789cd0ebf294c2ee6e0704b061b81104255878006d5fc1f9b81365a91266SHA-256
61f65e82aac0cec42c951dbf99460a6668a528f5a0b8175d1008b897468b4c29Raw analysis (JSON)Test recordEverything (ZIP)
The original input DXF is not included, so these files let you check the outputs but not yet reproduce the runs end to end.
Pavel is CTO at Kenzap and builds Kenzap Nesting, a free and open-source nesting tool. This is one production test, shared with the files behind it.
How does it handle your parts?
If you try the comparison with your own drawings, I'd like to hear what worked and what didn't. A different result is useful feedback too.