How to create a QR code for a menu and accept orders?
This guide demonstrates how to launch the Kenzap QR menu in 4 easy steps with the ability to accept orders directly to your mobile or tablet device.
- Upload dishes.
- Configure menu settings and style.
- Print QR-code stickers.
- Publish the menu.
- Do test order.
1. Upload Dishes
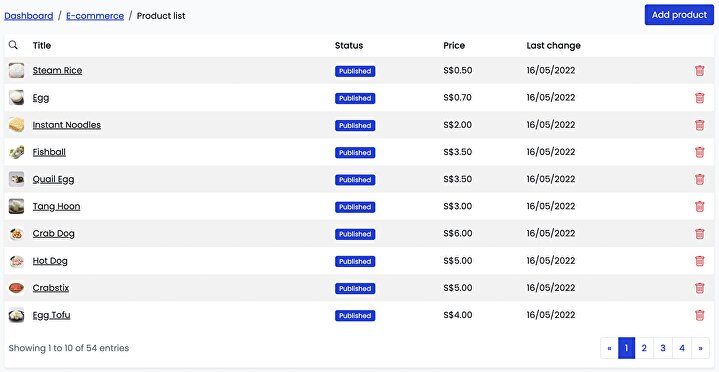
Uploading dishes is the very first step you need to do. Go to Kenzap E-commerce > Product List > Add product.
Under the modal window, provide the following information:
- Title - Dish name will be present when the menu is published.
- Short description - Any additional information about the meal.
- Price - Default price, discounts can be added later.
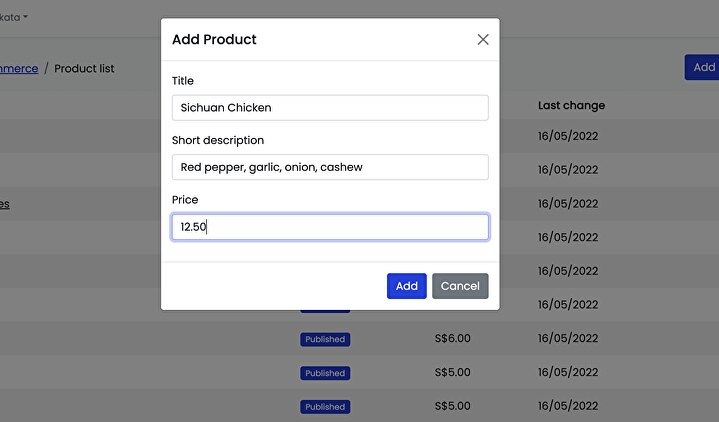
Once this information is provided hit on Add button and you will be redirected to the product edit page. Here you can provide more details about the dish, for example:
- Images - up to 5 dish images.
- Description - long description of the product.
- Discounts - limited offers and happy hours can be defined here.
- Variations - used to differentiate price offerings.
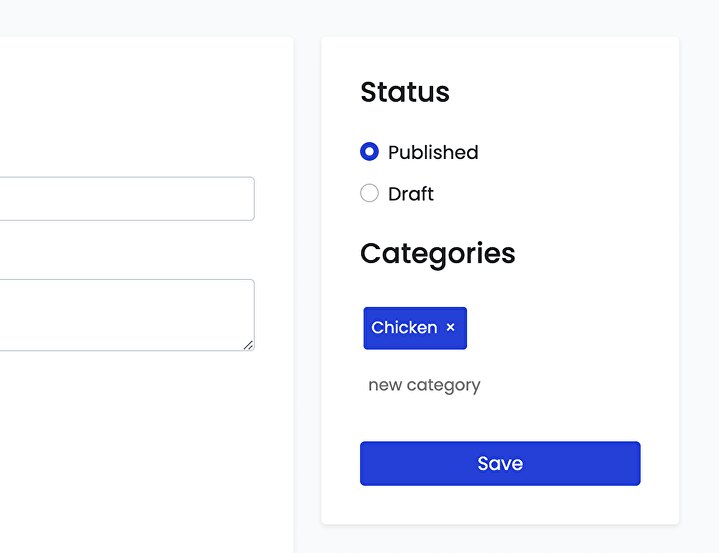
- Status - product visibility settings.
- Categories - product categories.
- Inventory - unique product identification number to match with third-party POS system or accounting.
- Stock management - live inventory management system.

Once the data is populated, repeat this step to upload more products to the Cloud.
When adding new products make sure to provide a consistent category structure and assign at least one category to each product as shown in the image below.
2. Configure Menu
There are different ways how you may customise the menu. Go to Kenzap QR Menu dashboard.

Some menu configurations to check out:
- Table selection - QR-code mode. Refer to dialogue notes for more details.
- Color palette - adjust the unique feel and look.
- Menu categories - same categories defined under product edit page. Categories are case-sensitive.
- Link - unique branded link of the menu.
- Translation - allows publishing multiple localised versions of the menu.
- Aggregate orders - allows same table order united into one.
- Fast checkout - skip additional dialogue prompts and sign-in requests from the user.
3. QR-Code Stickers
The system allows printing one universal QR-code for all tables with an additional table prompt upon checkout or printing individual stickers for each table separately (automatic mode).
When automatic mode is enabled you can pick the QR code by its table number, hit on the download icon, and use the downloaded code for further printing.
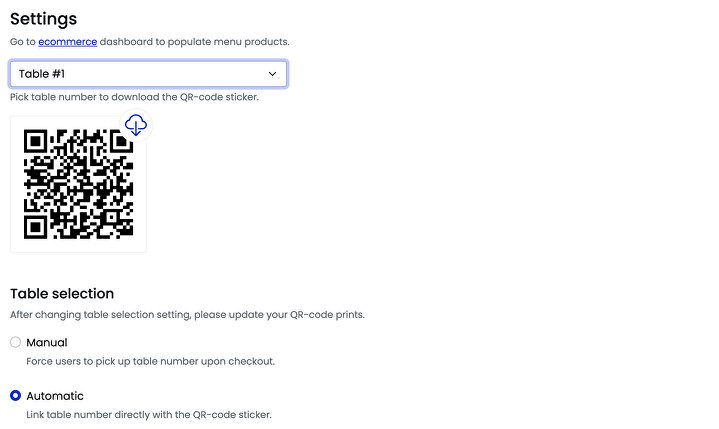
It is recommended to use automatic mode to minimise the risk of user errors. However, if your outlet does not have many tables you may choose (No table mode) and print one universal QR code for all tables without prompting the users to choose the table.
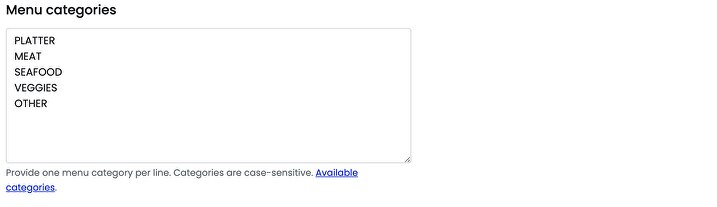
Another important setting is the Menu categories. Please provide categories entered earlier under the product edit sidebar. Make sure to provide one category per line.
4. Publish Menu
You can preview the menu directly from your computer or any other device. Simply click on Publish button as shown in the image below.
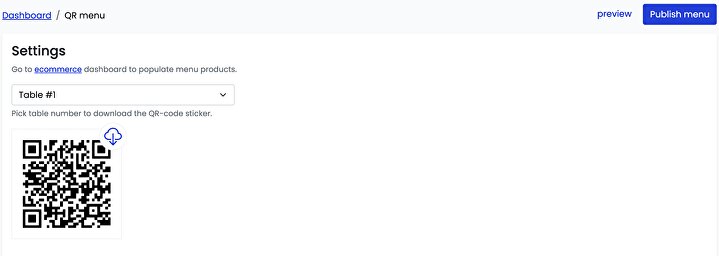
Then click on the preview to view the menu online.
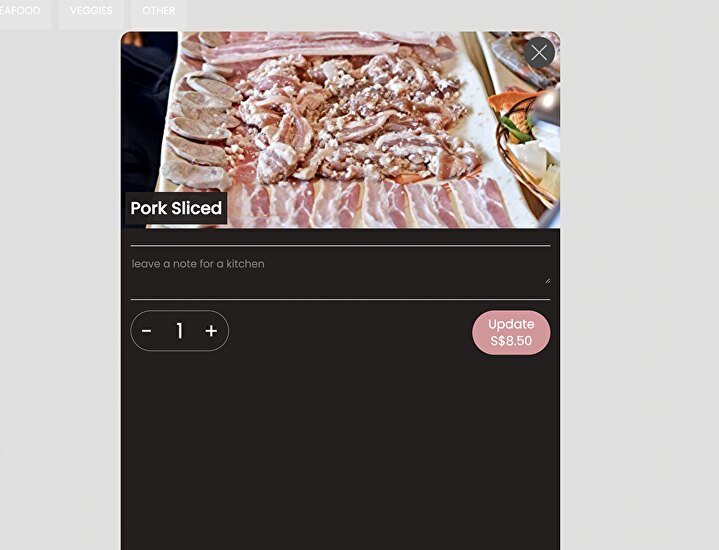
5. Test Order
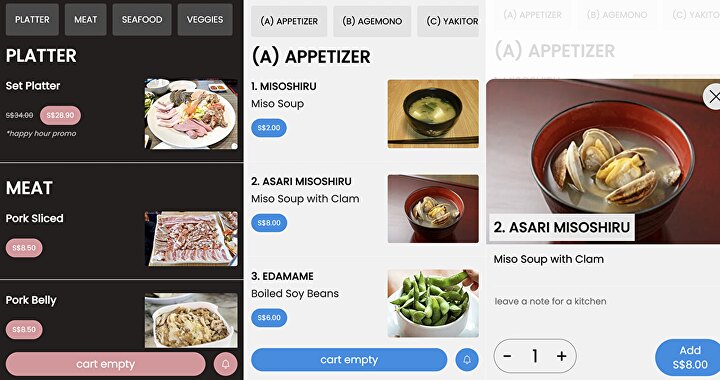
It is possible to test orders directly from your device. Add some products to the cart, click on the checkout and continue buttons.
After the order is placed successfully a successful order screen is previewed as shown in the image below.
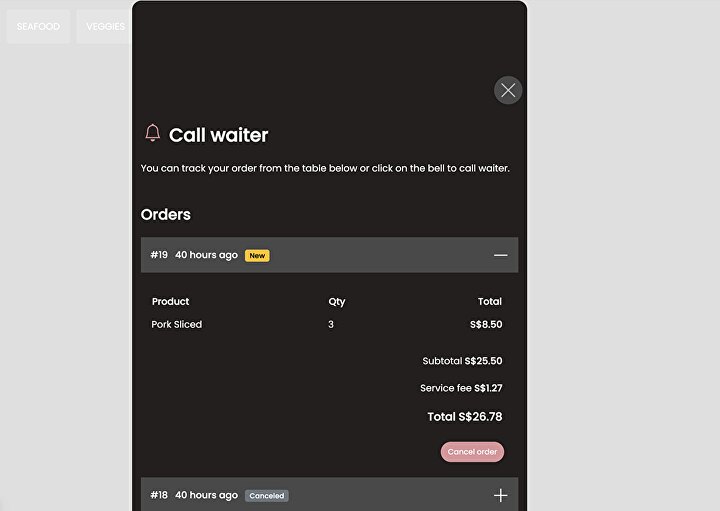
You can access this order from your Kenzap E-commerce > Orders dashboard to perform further order management.
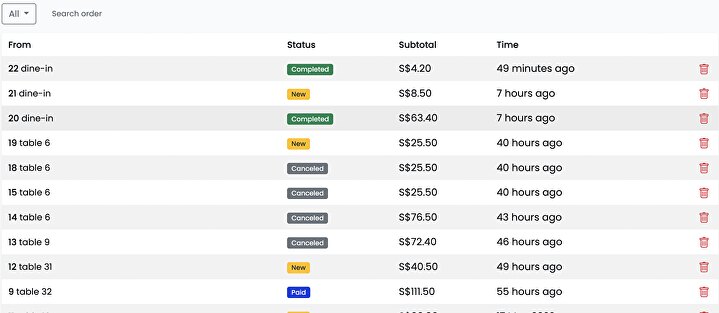
The order number is #19. By clicking on row 19 table 6 an order details preview will show up.
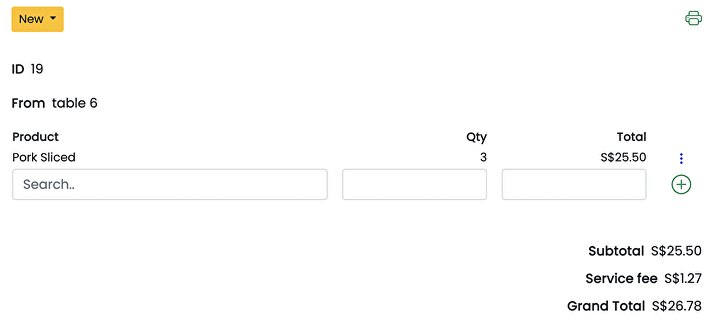
You can modify the order from this page. Add more products, add notes to the kitchen, update order status and recalculate order totals.
This guide is a simple how-to start tutorial, for more advanced customisation please refer to the links below:
- How to add a service fee to the checkout?
- How to view top selling dishes?
- Is it possible to add notes before checkout?
- How to setup waiter notifications?
- How to change main color of the menu?
- How to add tax calculations (GST)?
- Monthly accounting financial reports
- How connect Bluetooth printer to print receipts?
- Is it possible to connect Foodpanda and Deliveroo?
- How to prevent users from ordering out-of-stock products?
- Low on stock product updates?
- How can I get updates about existing order updates?
- How to add happy hours promotions?
- How to unite same table orders into one?
- Creating add-ons, price variations