Create a Seating Chart for a Stadium with Seat Numbers and Sell Tickets - Kenzap MyTicket
With the help of this guide, you will be able to create your own interactive concert hall layout, assign seats and let your users perform reservations online.
If you are new to Kenzap MyTicket, please refer to Create Event and Sell Tickets Online guide in order to learn how to configure your ticket management platform first.
Likewise, for the concert hall, you can rely on this guide to digitalise:
- Football stadium with a custom seat map
- Any type of sports stadium split into multiple interactive sectors
- Opera or theatre houses
- Arena, concert halls with a large number of standing seats
Prerequisites
This guide assumes that you:
- Are familiar with Kenzap MyTicket system
- Have an image of your layout in JPEG, PNG or WEBP format
- Have a static seating map chart or have minimal information about the seat numbers and sections
Creating a seating chart consists of the following steps:
- Uploading your layout image to MyTicket Cloud
- Mapping interactive zones with your layout image
- Allocating seats with numbers
- Linking your layout with the event
- Creating landing page for reservations
1. Upload Layout Image

You may wish to improve the design of your existing layout so that it looks more professional. It may also happen that you do not have access to the original sketch files that you need to customise. Feel free to reach Kenzap authorised designer directly for a quote to re-design the layout.
Go to Kenzap MyTicket Cloud Dashboard and navigate to the Layouts page.
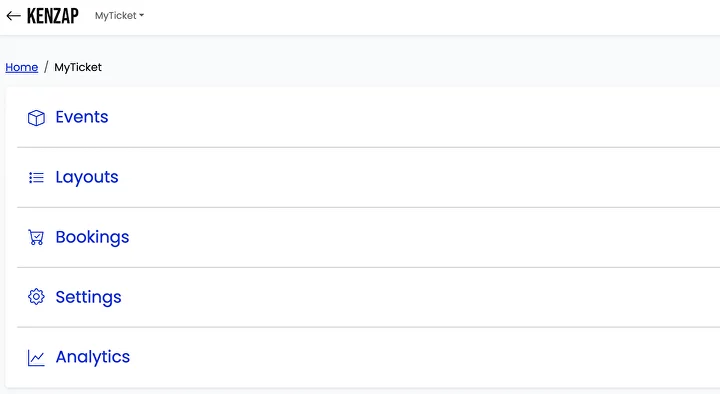
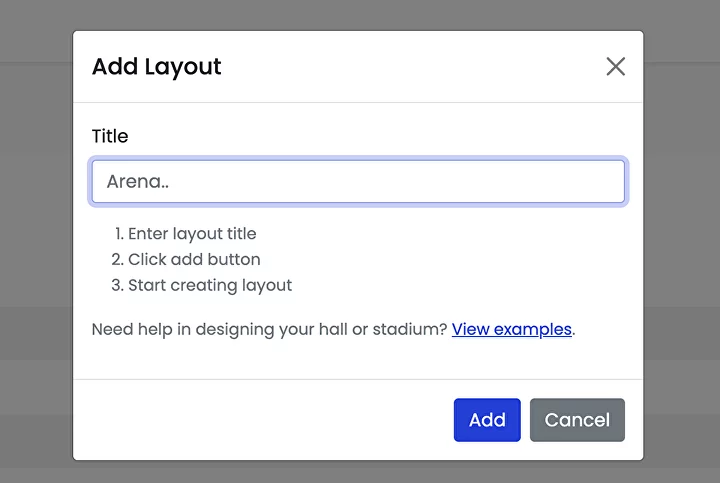
From the Layouts Page click on the blue "Add layout" button and provide your new layout title.
Navigate to the newly created layout by clicking on the record in the table and then drag and drop the layout image to the gray area. Your layout will be uploaded and rendered as shown in the image below.
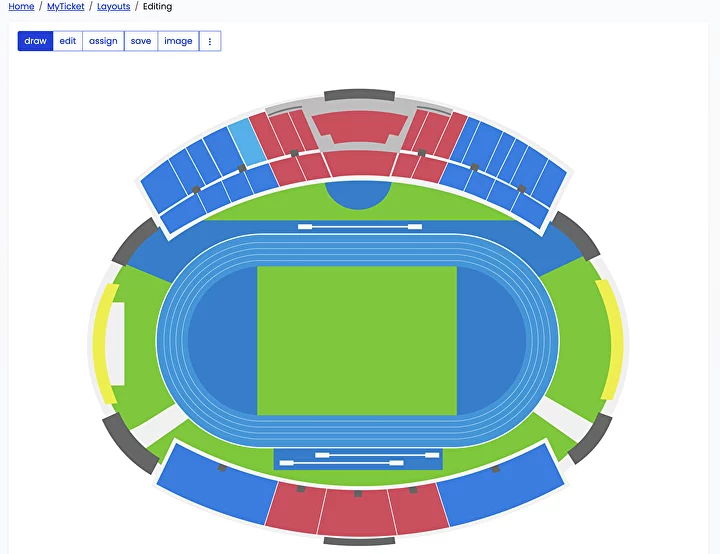
You are now ready to start mapping interactive zones with your layout.
2. Map Interactive Zones
To start mapping zones with your layout left-click on the mouse button at the place where you wish to start drawing (usually a corner of a sector). The line will automatically follow the cursor of the mouse.
To link the line left-click at every corner of the section until you reach the beginning point. Left-click on the beginning square dot to finalise the drawing. Please refer to the video below for more details.
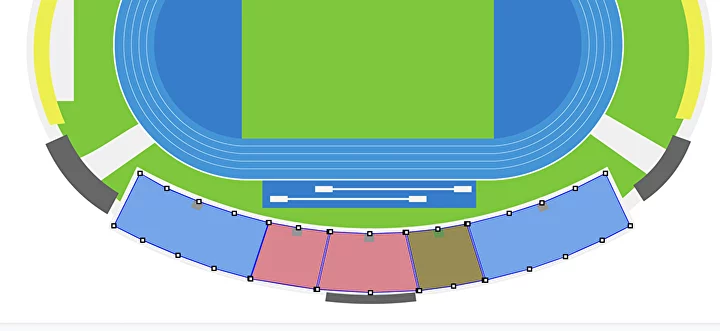
By following these steps, you can create custom-shaped zones such as the rectangular or polygons that follow certain elements of your layout.
The image below shows an example of mapped zones
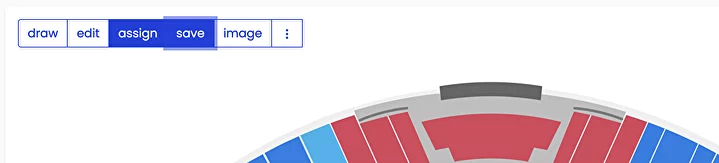
As you may have already noticed there is a tabbed navigation bar above the drawing area.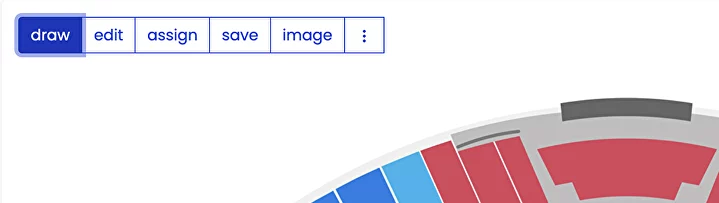
Each tab is responsible for the following functionality:
- draw – zone mapping mode (as explained in this chapter).
- edit – zone customisation mode, which allows reshaping, relocating, and rotating existing zones.
- assign – seat allocation mode.
- save – store the latest changes to your account.
- image – replace layout image.
- 3 dots – other options such as the layout export, import, export, stats, etc.
2.1 Relocate Zones
In the edit mode, you can modify already drawn zones. For example, click on the zone’s dot to relocate adjacent lines or click on the zone area itself to relocate the entire zone. Note, you can use the mouse or keyboard arrow keys during this operation.
2.2 Duplicate Zones
It may happen that some zones are exact replicas of other zones. In this case, you do not need to repeat the mapping process again.
In Edit mode copy and paste the zone by clicking CTRL + C on your keyboard. This keyboard shortcut creates an exact replica of the zone, its configurations and allocated seats.
2.3 Rotate Zones
Use CTRL + U to rotate the selected zone clockwise or CTRL + J to rotate the zone counterclockwise.
3. Allocate Seats
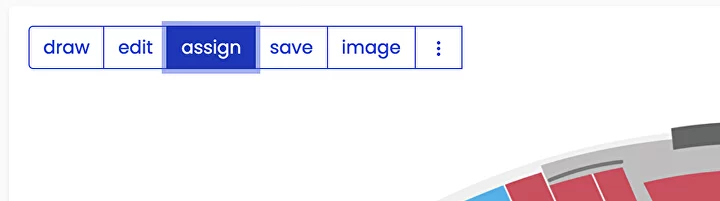
To allocate individual seats first switch to the assign mode by simply clicking on the tab as shown in the image below.
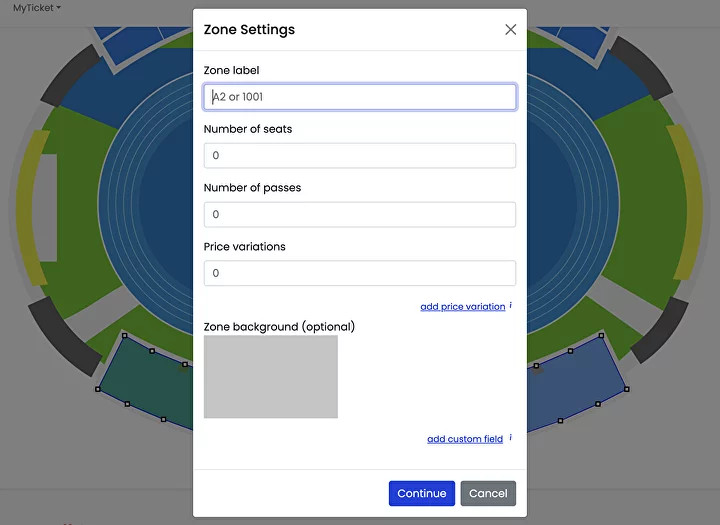
Then click on any zone that you would like to allocate seats to. A popup window shows up where you can configure the following zone settings.
- Zone label - zone title used for checkout and PDF tickets
- Number of seats - total number of seats per selected zone
- Number of passes - total number of passes or standing tickets without seats
- Price variations - enter variable price options
- Zone background - zone background image
- Custom fields - custom fields, for example, gate number, a section name or any other stadium or hall-specific information
The image below shows an example of our zone, with the required information filled in where:
- Zone label: Zone A
- Number of seats: 200
- Number of passes: 0
- Price variations: Adult set to 30 and Child set to 15
- Section: 1001
- Gate: Western

However, if you are only selling standing tickets without seats then your Zone settings may look the following way:
- Zone label: Fanzone
- Number of seats: 0
- Number of passes: 500
- Price variations: 12
- Section: 1000
- Gate: Central
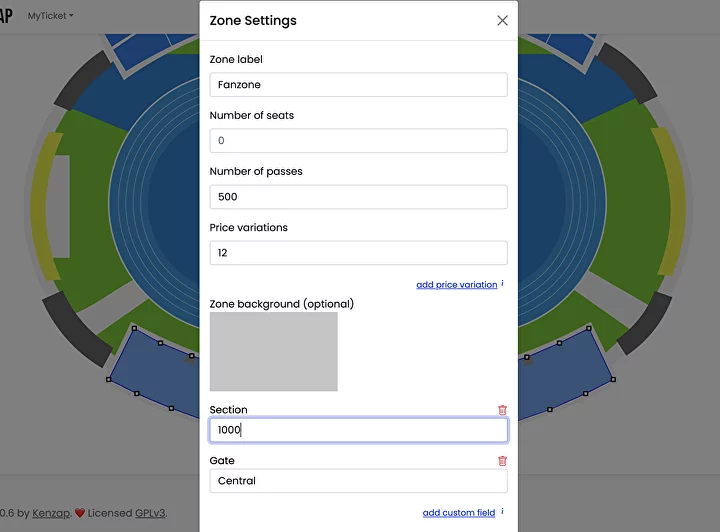
Note that the total number of seats is set to 0 but the total number of passes is set to 500 and the price per pass is universal and equals to 12. In such a way we instruct the layout to skip individual seat reservations.
To confirm the configurations do not forget to click on the blue "Continue" button and then click the "Apply" button in the top left corner of your screen.
3.1 Add Seats Manually
To start adding seats click on the desired zone. We use preconfigured Zone A example as described in the previous chapter.
While in the "assign" mode, in the popup window click on the "Continue" button and start dragging seats one by one to a desired location.
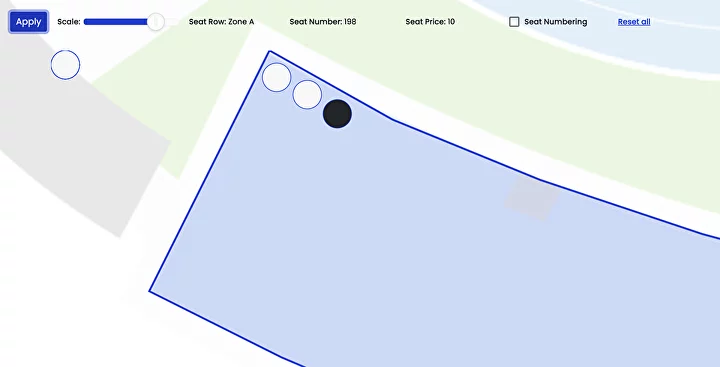
Note, you may use your keyboard arrows to slightly re-align the location of the seats inside the zone for pixel-perfect allocation.
This approach, however, may become very time-consuming when allocating a large number of seats.
3.2 Add Seats in Bulk
To start auto-allocating seats row by row click on the D button on your keyboard and follow this sequence of actions:
- Click on the D button on your keyboard.
- On your keyboard enter the number of seats to allocate, for example, 12.
- Click on the zone area with your left mouse button to set the first seat of the row.
- Without long delay click a second time on the left mouse button on the zone area to set the last seat of the row.
- All other seats between the first and last seats will be allocated automatically.
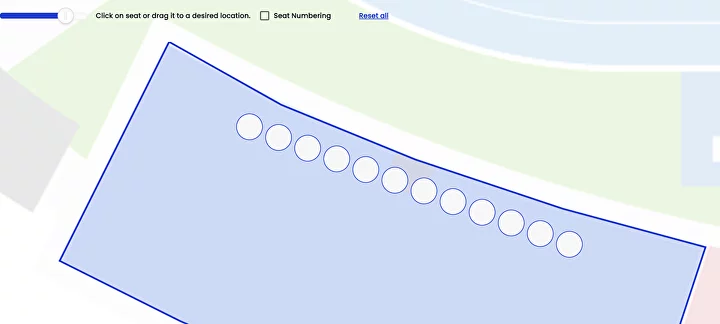
The image below shows an example of 12 automatically allocated seats within the zone. In such a way you can add perfectly aligned rows one after another significantly faster.
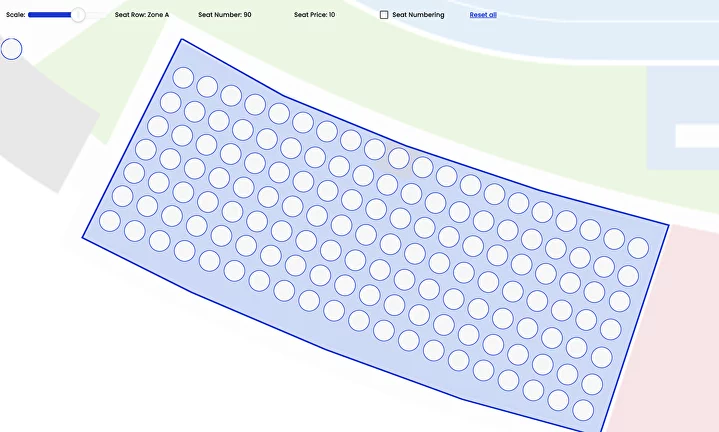
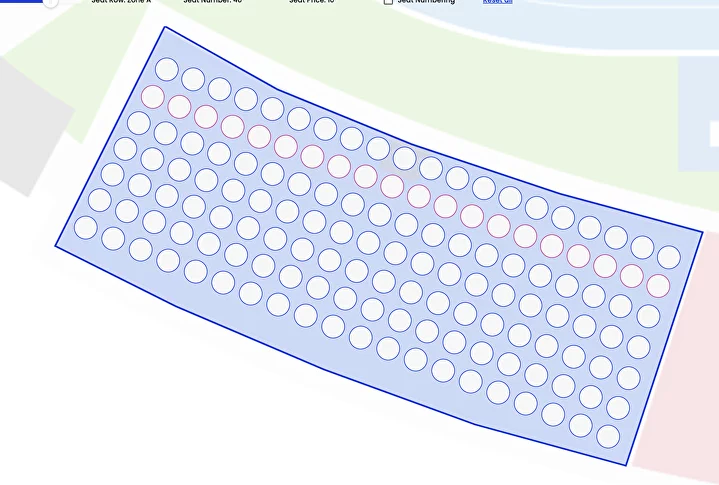
In the image below we allocated 20 seats per row. Note that you can adjust seat size by dragging the scale element in the top left corner of the screen.
3.3 Realign Rows
Sometimes your rows may not be perfectly aligned towards each other. In this case, you can realign the first and the last seat in the row either by draging it with your mouse or by clicking on the seat and relocating it with the help of your keyboard arrow keys.
Once the first and the last seat in the row are set to its correct position follow this sequence of actions:
- Click A letter on your keyboard and hold it
- While holding A letter, with your mouse click on the first seat in the row
- While holding A letter, without long delay click on the last seat within the same row.
All seats within the selected row will realign automatically. The system will highlight all realigned seats in red. An example is shown in the image below.
3.4 Seat and Row Numbers
To enable seat numbering mode, make sure that the Seat Numbering checkbox is checked.
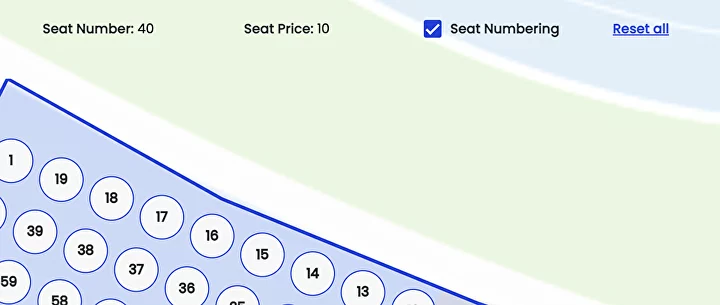
To assign a new seat or row number simply click on the desired seat and then enter the custom seat or row number in the input field above the zone.
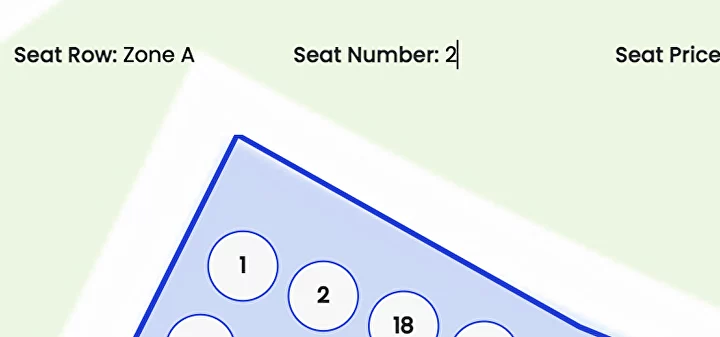
In a similar way, you can override the default price of the zone or price variations by entering custom prices in the Seat Price input field. Leave the Seat Price set to 0 if you want to use the global price of the zone instead.
To speed up the process of seat and row number allocation you can do the following:
- Click the Q button on your keyboard while keeping the cursor outside the seat.
- Slowly move the cursor through each seat within the desired row.
- Stop moving the cursor and wait until all highlighted seats revert to their original colour.
In the end, you will have a perfectly aligned and allocated zone as shown in the image below.
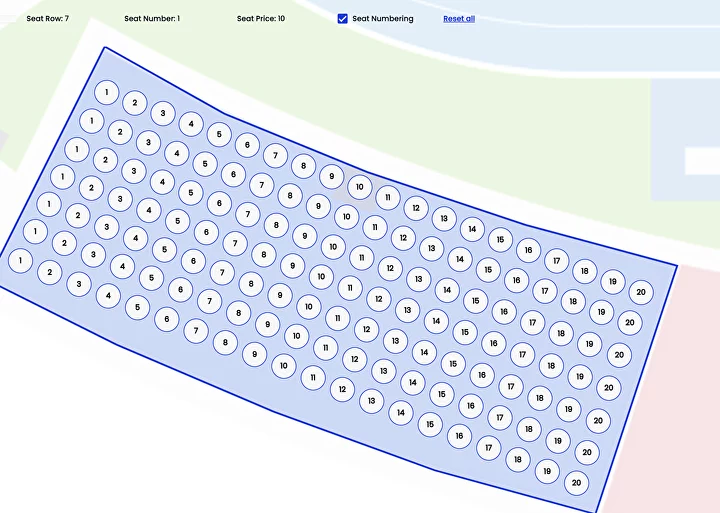
Repeat the same procedures with all other zones until your layout is fully digitalised. Once done, click on the save button to keep all your latest changes in the Cloud.
4. Link Layout
Now that your layout is configured you can try your first booking online. Go to MyTicket Dashboard > Events > Edit Event to link the layout to one of your events.
Click on edit package then check the Custom chart checkbox and select your layout. In this example, we use the My Stadium layout.
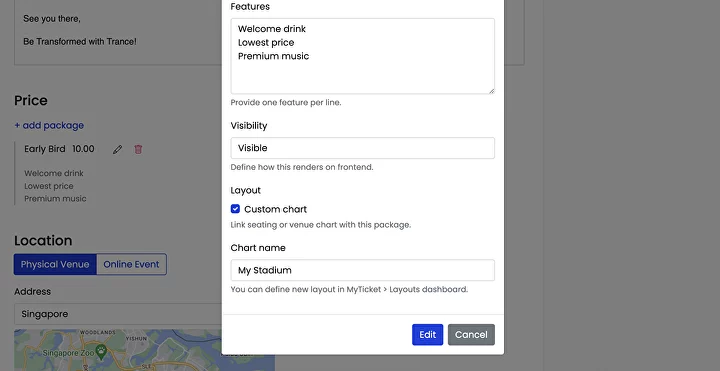
Click on the blue "Edit" button and then the "Save" button to keep the changes in the Cloud.
5. Reservations Page
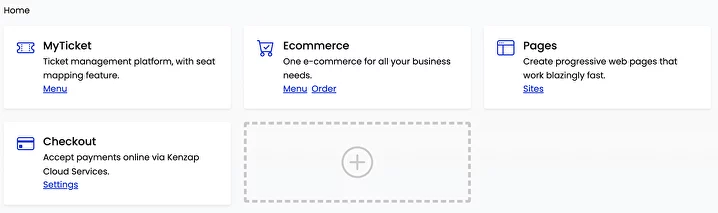
To create a landing page navigate to the Pages extension as shown in the image below. In case the Pages extension is missing in your Cloud Dashboard you can add it by clicking on the plus sign block.
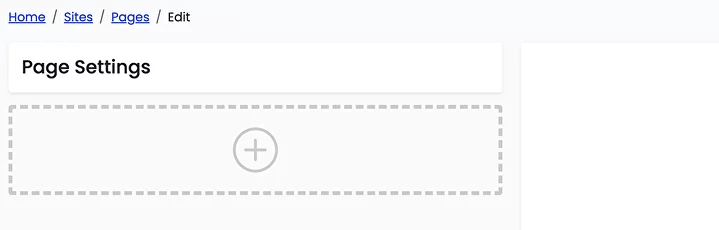
Create a site if not yet then add a new page and click on plus sign block.
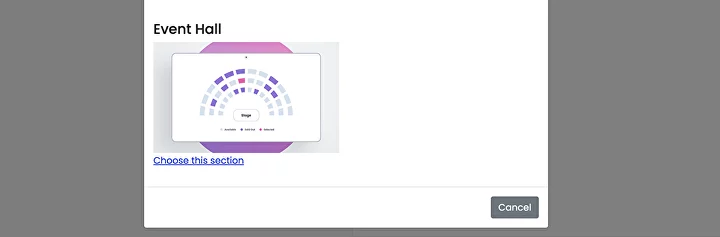
Search for the Event Hall section and click on Choose this section link.
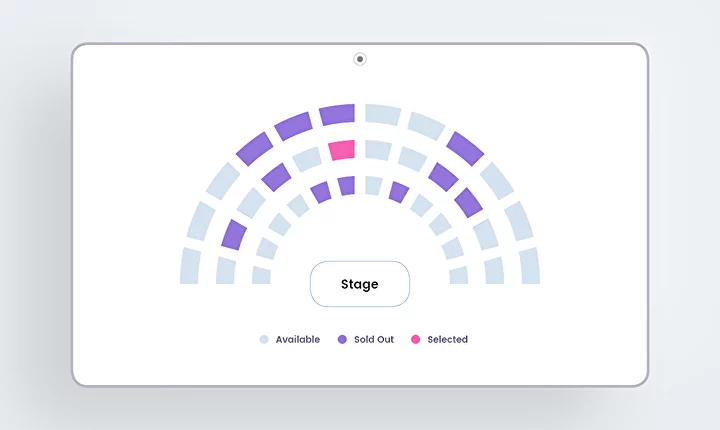
This will add an interactive version of your layout to the page. At this stage, you should be able to see the preview of your layout in the right pane as shown in the image below.
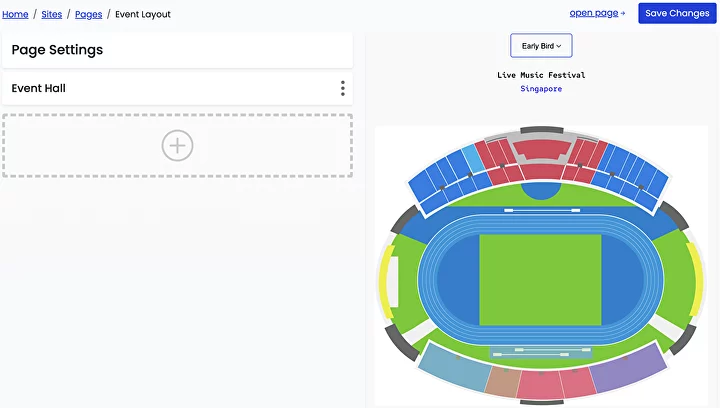
You can also click on any zone that contains allocated seats and try to do the reservation yourself.
When you click on the Fanzone the system will ask for the number of tickets to add to the cart instead of the individual seat reservation map.

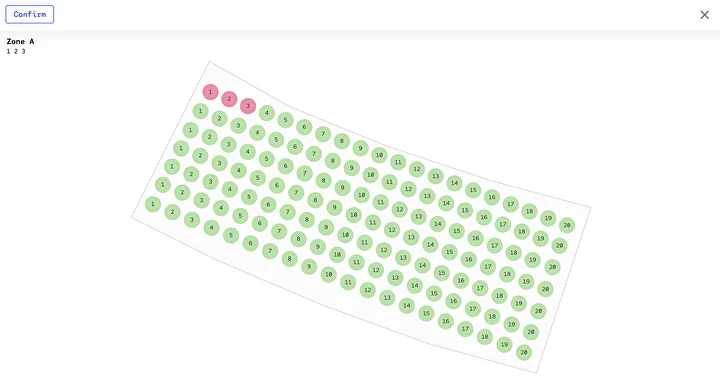
Note that when you click on the individual seat the price variation popup window will show up. Refer to Chapter 3 of this guide to revise the price variation definition.
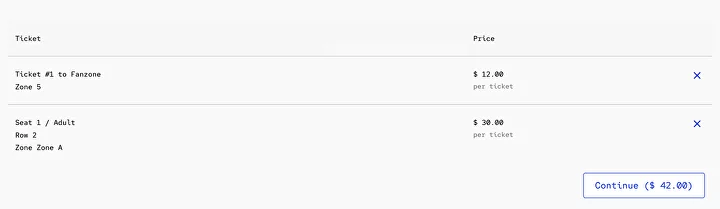
Once tickets are added to the cart a summary table is generated below the layout. You can click on the Continue button to finalise checkout.
Need more help? Request professional assistance or consultation directly from Kenzap software engineers.